
What is it all about?
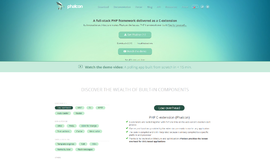
Silex is a PHP microframework based on Symfony2 and Pimple and inspired by sinatra.
Key Features
• Concise: Silex exposes an intuitive and concise API that is fun to use. • Extensible: Silex has an extension system based around the Pimple micro service-container that makes it even easier to tie in third party libraries. • Testable: Silex uses Symfony2's HttpKernel which abstracts request and response. This makes it very easy to test apps and the framework itself. It also respects the HTTP specification and encourages its proper use.
Pricing
Yearly
Monthly
Lifetime
Free
Freemium
Trial With Card
Trial No Card
By Quote
Description
free - see site
Product Analysis
PHP
PHP frameworks and libraries
Silex is a micro framework written in PHP and is one of the fastest in benchmarks for micro framework comparisons. It is based on Symfony components and also inspired by Sinatra.
There are two versions of Silex, ‘fat’ and ‘slim’. The fat version is completely featured and incorporates database abstraction, a template engine and various Symfony components while the slim version just accompanies a simple routing engine.
Fabien Potencier and Igor Wiedler originally created the Silex framework. It was initially released on the 16th of September 2010 as a “web framework proof-of-concept”.
What is Silex good for
Silex is a good framework for creating big and small applications such as REST APIs. In addition, Silex can be used as a full stack MVC framework. Also this micro framework is very helpful when creating projects in which you are forced to architect your own code base. It gives you a lot of power and responsibility.
Silex is also good for its speed.
The following are the advantages why you should use Silex in your application :
- Based on the Symfony HttpKernel component
- High Quality Code Base
- Easy to Include Third-Party Libraries
- Handling of Errors
- Testing Performance of Websites
Example and code snippets
To begin, you should install Silex into your development environment. If you are using Vagrant, or you have Composer installed, you can simply go to the folder into which you want to install Silex and make a composer.json file with the following inside.
{
   "require": {

       "silex/silex": "~1.1",

       "twig/twig": ">=1.8,<2.0-dev",

       "symfony/twig-bridge": "~2.3"
   }
}
Then run:
composer installThe goal is to make one singular file that will contain PHP--the rest will substance out the website with Twig layout files and CSS. So extract the Silex into the folder and make an index.php file.
First up, let’s set up Silex.
<?php

require_once __DIR__.'/vendor/autoload.php';

$app = new Silex\Application();

$app['debug'] = true;
Simple, right? It incorporates the autoloader for Silex and makes another application, stored into the $app variable.
Clearly you would prefer not to leave the debug flag when running in production, yet it gives detailed and useful information if we hit any errors during our development. Simply remember to remark it out or remove it when moving to a production environment.
$app->register(new Silex\Provider\TwigServiceProvider(), array(

'twig.path' => __DIR__.'/views',

));


$app['twig'] = $app->share($app->extend('twig', function($twig, $app) {

   $twig->addFunction(new \Twig_SimpleFunction('asset', function ($asset) use ($app) {

       return sprintf('%s/%s', trim($app['request']->getBasePath()), ltrim($asset, '/'));

   }));

   return $twig;

}));


$app->register(new Silex\Provider\UrlGeneratorServiceProvider());
Next up we register Twig with our app. For those curious you would do this:
$app['twig'] = $app->share($app->extend('twig', function($twig, $app) {

   $twig->addFunction(new \Twig_SimpleFunction('asset', function ($asset) use ($app) {

       return sprintf('http://external.assets.com/%s', trim($app['request']->getBasePath()), ltrim($asset, '/'));

   }));

   return $twig;

}));
Now we register the URL Service given in the Silex framework allowing us to create links with ease.
Silex Website index.php
$app->before(function ($request) use ($app) {

   $app['twig']->addGlobal('active', $request->get("_route"));

});
$app->before() is kept running before the controller is executed and is ran regardless of the route being shown. That is the reason we are utilizing it here, it is kept running before the templating framework has executed so we can add a global variable to Twig with no issues.
$app->get('/', function() use ($app) {

return $app['twig']->render('layout.twig');

})->bind('home');

$app->run();
How about we make our twig? Twig is a great templating engine.
In this file you have to make the layout or the regular HTML code that all our pages will utilize.
This will be a major code block.
<!DOCTYPE html>

<!--[if lt IE 7]>      <html class="no-js lt-ie9 lt-ie8 lt-ie7"> <![endif]-->

<!--[if IE 7]>         <html class="no-js lt-ie9 lt-ie8"> <![endif]-->

<!--[if IE 8]>         <html class="no-js lt-ie9"> <![endif]-->

<!--[if gt IE 8]><!--> <html class="no-js"> <!--<![endif]-->

   <head>

       <meta charset="utf-8">

       <meta http-equiv="X-UA-Compatible" content="IE=edge">

       <title>This is Example </title>

       <meta name="description" content="">

       <meta name="viewport" content="width=device-width, initial-scale=1">


       <link href="//maxcdn.bootstrapcdn.com/bootstrap/3.2.0/css/bootstrap.min.css" rel="stylesheet">

       <link href="//maxcdn.bootstrapcdn.com/bootswatch/3.2.0/darkly/bootstrap.min.css" rel="stylesheet">

       <link href="{{ asset('css/styles.css') }}" rel="stylesheet">


       <!-- Place favicon.ico and apple-touch-icon.png in the root directory -->

   </head>

   <body>

     <div class="navbar navbar-inverse navbar-fixed-top" role="navigation">

       <div class="container">

         <div class="navbar-header">

           <button type="button" class="navbar-toggle collapsed" data-toggle="collapse" data-target=".navbar-collapse">

             <span class="sr-only">Toggle navigation</span>

             <span class="icon-bar"></span>

             <span class="icon-bar"></span>

             <span class="icon-bar"></span>

           </button>

           <a class="navbar-brand" href="{{ path('home') }}">L&LLF</a>

         </div>

         <div class="collapse navbar-collapse">

           <ul class="nav navbar-nav">

             <li{% if active == 'home' %} class="active"{% endif %}><a href="{{ path('home') }}">Home</a></li>

           </ul>

         </div><!--/.nav-collapse -->

       </div>

     </div>


     <div class="container">

       {% block content %}

       <div class="starter-template">

         <p><img class="img-responsive" src="{{ asset('img/llama-loaf.jpg') }}" alt="Image 'Llama Loaf' by Ian Sane"></p>

         <h1>Lorem ipsum dolor</h1>

         <p class="lead">Lorem ipsum dolor sit amet, consectetur adipiscing elit. Pellentesque pretium elementum elit vitae aliquam. Morbi ac diam sagittis turpis sodales fringilla. Donec vehicula ligula in erat scelerisque laoreet. </p>

         <p><small>Image 'Llama Loaf' by <a href="https://www.flickr.com/photos/31246066@N04/" title="Ian Sane on Flickr">Ian Sane</a></small></p>

       </div>

       {% endblock %}

     </div><!-- /.container -->

     <script src="//ajax.googleapis.com/ajax/libs/jquery/1.10.2/jquery.min.js"></script>

     <script src="//maxcdn.bootstrapcdn.com/bootstrap/3.2.0/js/bootstrap.min.js"></script>

   </body>

</html>
That is a lot of code, yet the greater part of it is only a standard HTML file with Bootstrap appended by means of the BootstrapCDN.
How about we experience a portion of the uncommon code? In the first place is our connection tag.
<link href="{{ asset('css/styles.css') }}" rel="stylesheet">Next up is the path() helper.
<a class="navbar-brand" href="{{ path('home') }}">L&LLF</a>This produces a relative path (from root) to the route named home.
<li{% if active == 'home' %} class="active"{% endif %}><a href="{{ path('home') }}">Home</a></li>Finally is the main chunk. The block.We created a global variable for Twig called active.
{% block content %}

   <div class="starter-template">

       ...

   </div>

{% endblock %}
You ought to have the capacity to force it open in your program and see it in all its greatness.
Now let’s add two more pages.
Place this inside the new about.twig file.
{% extends 'layout.twig' %}

{% block content %}

 <div class="starter-template">

   <p>

     <img class="img-responsive" src="{{ asset('img/llama-farma.jpg') }}" alt="Llama Farmer? No problem!">

   </p>

   <p class="lead">Llama farmer? No problem, add your best llama pic above!</p>

 </div>

 <div class="row">

   <div class="col-md-8">

     <h2>Who Are We?</h2>

     <p>We are Lily & Larry's Llamas. Llama farmers from Llangynidr in Wales.</p>

     <h2>What Are Your Plans?</h2>

     <p>To breed, show & shear award winning Llamas with bows in their fur.</p>

     <h2>This Is Madness!</h2>

     <p>That is because this is a demo, none of this content matters. It is all just nonsense.</p>

   </div>

   <div class="col-md-4">

     <h3>Is This A Sidebar?</h3>

     <p>Yes... Yes, it is. You could add more Llama based links here.</p>

   </div>

 </div>

{% endblock %}
This is pretty simple.
Presently we should make our contact template as well. In the pages folder once more, make contact.twig. At that point fill it with this content.
{% extends 'layout.twig' %}

{% block content %}

   <div class="starter-template">

       <h1>Contact Us</h1>

       <p class="lead">Want some Llama farming tips? Get in touch using the form below.</p>

   </div>

   <div class="row">

       <div class="col-md-4">

           <p><img class="img-responsive" src="{{ asset('img/long-llama.jpg') }}" alt="Image 'Llama' by Asra Valorshon"></p>

           <p class="text-center"><small> Image 'Llama' by <a href="https://www.flickr.com/photos/26548797@N00/" title="Asra Valorshon on Flickr">Asra Valorshon</a></small></p>

       </div>

       <div class="col-md-8">

           <p>Contact us using the form below.</p>

           <form role="form" method="get" action="{{ path('home') }}">

               <div class="form-group">

               <label for="name">Name</label>

               <input type="name" class="form-control" id="name" placeholder="Enter Name">

             </div>

             <div class="form-group">

               <label for="email">Email address</label>

               <input type="email" class="form-control" id="email" placeholder="Enter email">

             </div>

             <div class="form-group">

               <label for="message">Message</label>

               <textarea name="message" id="message" class="form-control" rows="3" placeholder="Enter Your Message"></textarea>

             </div>

             <div class="form-group">

               <button type="submit" class="btn btn-default">Send It</button>

             </div>

           </form>

       </div>

   </div>

{% endblock %}
Now, one last change to a template . We have to include two additional connections to our Nav bar. Open up layout.twig and include these under the home link.
<li{% if active == 'about' %} class="active"{% endif %}><a href="{{ path('about') }}">About</a></li>

<li{% if active == 'contact' %} class="active"{% endif %}><a href="{{ path('contact') }}">Contact</a></li>

So you should now have:

<ul class="nav navbar-nav">

   <li{% if active == 'home' %} class="active"{% endif %}><a href="{{ path('home') }}">Home</a></li>

   <li{% if active == 'about' %} class="active"{% endif %}><a href="{{ path('about') }}">About</a></li>

   <li{% if active == 'contact' %} class="active"{% endif %}><a href="{{ path('contact') }}">Contact</a></li>

</ul>
Now let’s add in the code to our index.php file so Silex will create the pages. Under your home route, add the following.
$app->get('/about', function() use ($app) {

return $app['twig']->render('pages/about.twig');

})->bind('about');

$app->get('/contact', function() use ($app) {

return $app['twig']->render('pages/contact.twig');

})->bind('contact');
That's it. All done.
In the event that you visit your application you ought to have a definite copy of the site made in this demo.
Conclusion
Besides the fact that Silex is a strong framework for building small scale projects, Silex is an incredible entryway to the relentless Symfony and permits software engineers to acquaint themselves with Symfony without familiarising the framework. Another thing about Silex, it is a great advantage for beginners because they’ll have the chance to build up a working application in a simple manner. In the event that you are new to this PHP microframework, go on and give it a shot!


X
Compare Products
Select up to three two products to compare by clicking on the compare icon () of each product.
{{compareToolModel.Error}}Now comparing:
{{product.ProductName | createSubstring:25}} X
{{CommentsModel.TotalCount}} Comments
Your Comment