PyQt-graphical user interface
There is a wide range of GUI libraries, many of them as Tkinter, wxPython and more were imported to Python. This post covers the library PyQt, which is a Python shell of the famous Qt library. It’s included in major Python distributions like Anaconda which includes the scientific package and many others.
First let’s Import the necessary modules:
In [1]: mport sys
In [2]: from PyQt4 import QtGui
Create PyQt application object. Currentlly is not affected, but will be used later:
In [3]: window = QtGui.QApplication(sys.argv)Now Creating the main window - Qwidget ()
Determine the size and location of the window, title, and display the window by the command Show().
In [4]: win = QtGui.QWidget()
In [5]: win.resize(450, 250)
In [6]: win.move(500, 300)
In [7]: win.setWindowTitle('DiscoverSDK')
In [8]: win.show()
In [9]: sys.exit(window.exec_())
We enter the processing loop by the events of PyQt
() Function _exec.app of the object we created in the beginning. This loop does not repeat until the main window is closed.
This loop shows All windows, receives the events like button clicks and writing text boxes, And processes them.
The function is called () _exec to distinguish the exec of a Python.
The return value of the function () _exec transferred to Exit ().sys and is carried an exit. Optional include () Exit.sys, and you could write the series 9 also this:
In [10]: app.exec_()
When working with Spyder, you have to write it like this app.exec_() without Exit.sys() command which Blowing the IPython and requires to restart.
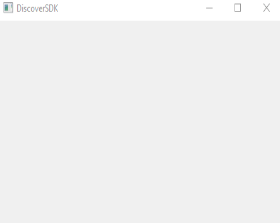
Now we design a simple program designed to insert a button that lists the number of clicks to the window we created earlier, we set the variable count to count the clicks.
In [11]: import sys
In [12]: from PyQt4 import QtGui
In [13]: window = QtGui.QApplication(sys.argv)
In [14]: count = 0
In [15]: win = QtGui.QWidget()
In [16]: win.resize(250, 150)
In [17]: win.move(300, 300)
In [18]: win.setWindowTitle('DiscoverSDK')
In [19]: win.show()
We've created a label and a button and set the text that will appear in them.
In [20]: label = QtGui.QLabel(win)
In [21]: label.setText(str(count))
In [22]: butn = QtGui.QPushButton(win)
In [23]: butn.setText('Counter')
Placing any component on the window accurately by coordinates can be difficult, and not flexible. instead we’ll use layout manager.
In this case we use QVboxLayout .We set it as the main window layout manager (immediately after the line we creat it) and in the following lines we add managing controls and he arranges and QVboxLayout set them vertically.
There is also layout manager for placing component horizontally which is called QHboxLayout.
In [24]: vbox = QtGui.QVBoxLayout()
In [25]: win.setLayout(vbox)
In [26]: vbox.addWidget(label)
In [27]: vbox.addWidget(butn)
Now let’s created a function which be called by PyQt when pressing the button. This function promotes the counter and updates the label.
In [28]: def on_butn_click():
In [29]: global count
In [30]: count += 1
In [31]: label.setText(str(count))
Now we need to connect between the button and the function we defined a moment ago.
In [32]: butn.clicked.connect(on_butn_click)
In [33]: sys.exit(window.exec_())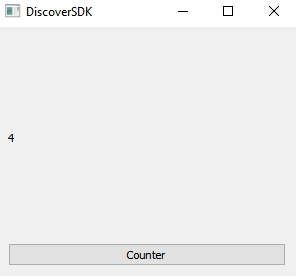
we cam see the layout manager spread over the whole window Height and width. You can handle it with optional arguments which will be introduced later.
GUI applications display the window and remain in work, so you can run them as
Any other application as Independent program whitout needing the shell.
However, it is important to remember that developmers should not work with this method. Because there may be glitches occurring prior to creating the window. In this case the normal operation of application system Just finished without viewing the window and we wouldn’t know what happened. The solution is, obviously, open a shell screen and run a command line.
Using Qt Designer
Qt Designer is part of the Qt creator interface
We’ll creat a new Main Window with buttons:
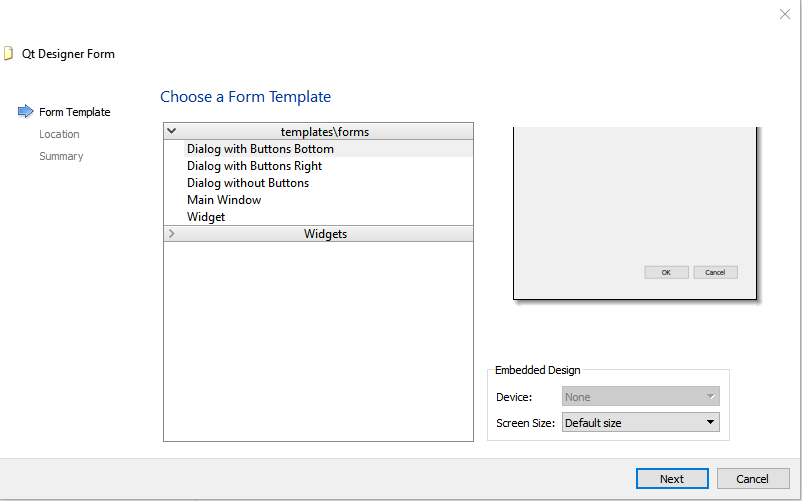
You can also work with location managers, offers a more professional Window.
There are two problems:
1 . Sometimes you can not drag a component to a particular place in the window, for example, from the control to the frame, Because of the lack of margins.
2 .perform Align of controls for one side of the window does not work well.
when working with the layout managers, you should determine the primary layout manager. We will select the horizontal layout position.
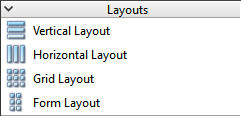
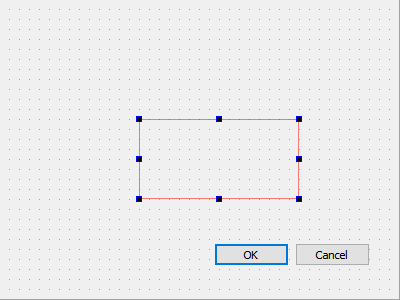
Pressed somewhere in the blank window deselect the location and pressed on the toolbar button symbolizing a horizontal position. the red rectangle will be spread over the entire window.
![]()
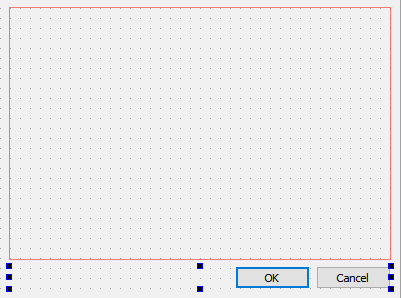
On the right side is the editor Property area. I will not dwell on it, you just should
search and modify the appropriate features controls was voted.
Now let’s put inside 3 spacers another vertical layout and two buttons (you can set names with double clike on the button):
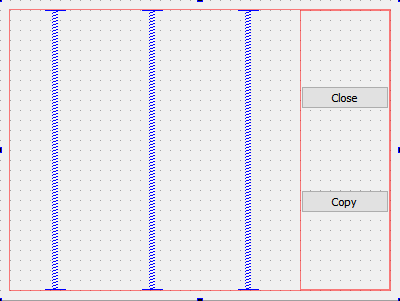
we can split both buttons by another spacer.
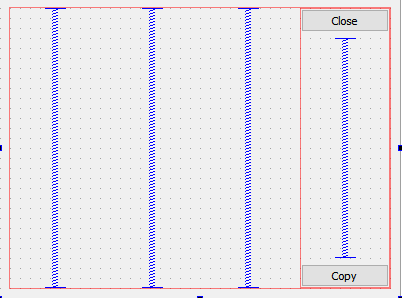
Now we will create the event link for the Close button.
In order to do so we need to activate the Singnal & slots Editor by Right-click and choosing it.
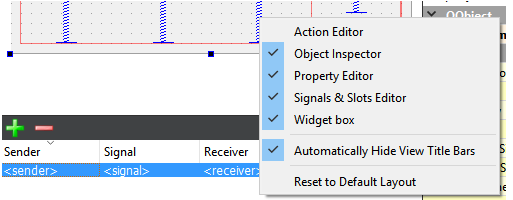
Now, In order to define all the fileds we need to set names for the main window, it will be the Reciver. and for the Close button itself (the sender). For changing the names we need to select the window/button and change the objectName.
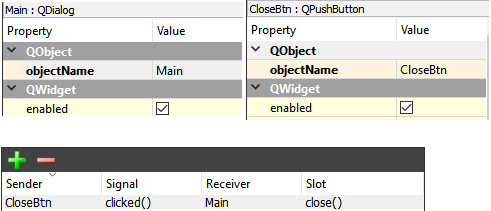
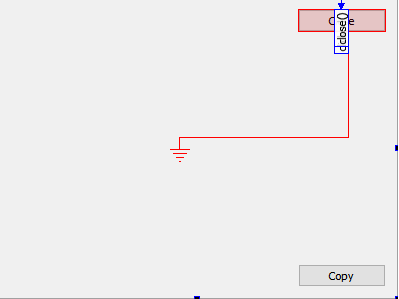
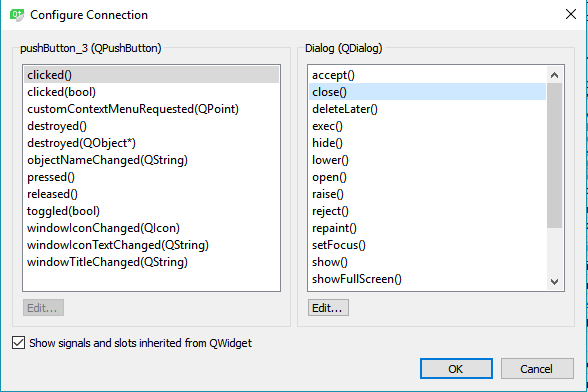
But it can also be done by pressing the F4 . At this work mode click with the mouse at the generates a control signal, dragging the marker and releasing it to the control that contains the slot, then a window appears with the options link a signal
to a slot.
In order to create signal from the close button to the window, pressed the button and release it at empty area of the window:
Then the following window appears:
Go back to edit mode. By menu, toolbar, or pressing F3.
save the window file(Win1.ui) and move to the next step.
How to Combine our program in Python
Now will use Pyuic4 app that turns the .ui file to Py file which contains the code that creates the window with all the controls and the events that we have created.
At Anaconda latest distribution Pyuic4 can be activate it using the command line by writing the following command:
In [34]: pyuic4 Win1.ui -o Win1.py
The file will be created is a Python file named as we asked for, and contains all the creating GUI commands we defined So far.
If we’ll activate it, we will get the window when the Close button actually closes the window.
Integrate the automatic code in our program
You can run this file and see the window, but in practice it isn’t be used that way, because we need to introduce changes. For example, to define a method which will be activated when pressed Copy button - this is code we have to write our own.
But when we want to operate an update in the designer and generate the code again, the file will be recreated and What we wrote will be deleted!
the method to use this file:
We will create a new file, named Py.MyWin, and this is the initial payload:
from PyQt4 import QtGui, QtCore
from Win1_UI import Ui_Main
class Win1(Ui_Main):
pass
import sys
app = QtGui.QApplication(sys.argv)
Main = QtGui.QMain()
3 ui = Win1()
ui.setupUi(Main)
Main.show()
sys.exit(app.exec_())
Link to the method, we writing
Return to deisnger. We have seen how to link to slot to a known signal.
How are we bind the signal to the slot we suppose to write?
Simply add the code manually in the new file.
because that the class Win1 inherit the class Main_Ui, anywhere
Self is written, it becomes essentially addressed to the heir class.
Here is the updated code file Win1.Py:
from PyQt4 import QtGui, QtCore
from MyWin_UI import Ui_MainWindow

class Win1(Ui_Main):
 def connect_signals(self):
 ---> line 5 <--- self.Copybtn.clicked.connect(self.on_copy(False))
 def on_copy(self, is_reverse):
 def func():
 txt = self.lineEdit.text()
 if is_reverse:
 txt = txt[::-1]
 print txt
 return func
import sys
app = QtGui.QApplication(sys.argv)
Main = QtGui.QMain()
ui = Win1()
ui.setupUi(Main)
---> line 18 <--- ui.connect_signals()
Main.show()
sys.exit(app.exec_())
Line 5 we define a new method. Is not automatic.
In line 21 we added an appeal to this method.
This method operate the signal link to click Copy button in our method, as we have seen earlier.
The method is defined with closure.
In Line 8 we define the Copy_on.
We will finish our program. Here is the updated code section:
class Win1(Ui_Main): def connect_signals(self):
self.Copybtn.clicked.connect(self.on_copy(False))
self.Copybtn.clicked.connect(self.update_label)
self.Reversebtn.clicked.connect(self.on_copy(True))  def update_label(self):
self.lbl.setText(self.lineEdit.text())
In Line 1 we add the link of copy to label_update we define immediately afterwards in line 3.
In line 2, we linking the clicking on Copy Revese to the function created by the closure we defined earlier, this time with the True argument.
Summary of the designer:
1 . You can drag the window controls without the use of layout manager.
- Using layout manager creates windows that behave appropriately when changing their size.
- When using layout manager we faced the problem we can’t drag controls to some places due to lack of space. You can solve this in two ways:
- drag the prototype control to the right in the Object Inspector
- Select Menu feature by changing the margin of the prototype.
4 . Generate automatic code from a design by application Pyuic4.
5 .Generate a Manual file with a new class inherits the class
from file that is created automatically. Add code for the window production.
6 Connection signal to the slot is very simple for the various slots on existing controls.
7 . we will create the link manually to the method, for the slots we write.
Recent Stories
Top DiscoverSDK Experts


Compare Products
Select up to three two products to compare by clicking on the compare icon () of each product.
{{compareToolModel.Error}}


{{CommentsModel.TotalCount}} Comments
Your Comment