Docker - Getting into Containers and more
In the last article, our first in this series on Docker, we learned about Docker containers and I demonstrated running a container that runs PHP. We also saw that a container is like a service—I can start as many as I want according to a certain pattern. In this article we’ll dive a little deeper into Docker containers.
This time we’ll use a MySQL container for our examples. As far as I can tell it’s still the most popular database out there, and it can also be run as a Docker container. As in the PHP example, here too we can either use a settings file, or make use of the official MySQL file without the need of creating our own. Since we still didn’t learn about settings files in Docker, we’ll go with the official settings file for MySQL in Docker.
As stated on Docker’s site, we must create the container like so:
docker run --name mysql -e MYSQL_ROOT_PASSWORD=my-secret-pw -d mysql:5.6
Let’s go over this command again. docker run --name mysql. The command docker run creates the container. Coming after the name flag is the name we choose for our container.
-e is a flag we haven’t seen yet. It allows us to put environmental variables inside the container when we’re creating it. In this case, I’m putting in the environmental variable MYSQL_ROOT_PASSWORD. How do I know I have to use this? Because it’s written in the documentation of the official MySQL Docker settings file:
MYSQL_ROOT_PASSWORD

This variable is mandatory and specifies the password that will be set for the MySQL root superuser account
The -d flag makes the container run in the background.
mysql:5.6 is the official name of the container. What comes after the colon is the version. In this case I used 5.6 but in the documentation there are other versions and names. This name and the versions appear in the documentation.
After I’ve run the command, I can then run:
docker ps -a
Check out how the container is now active!

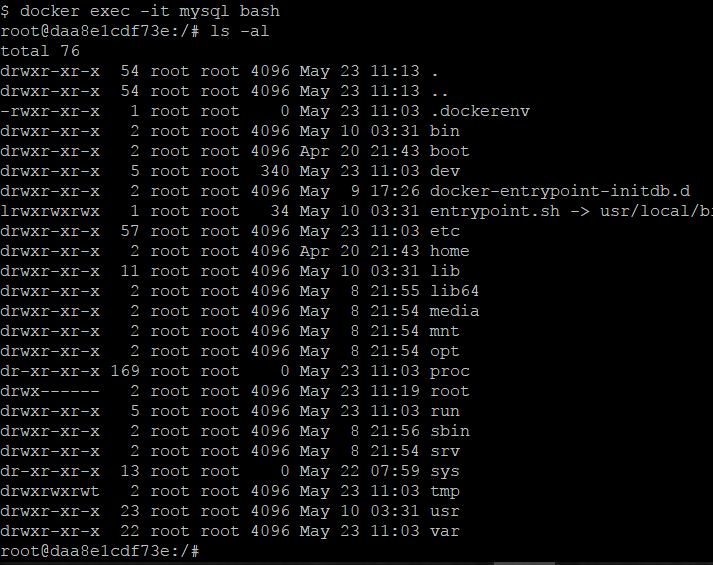
Now what? As opposed to PHP, I need to connect to the database. There are a few ways to connect to the database, but the easiest way is through the command line. Yep, just like in MySQL installed on Linux I can go into the container and run a query! How do we do this? Simple and easy! Meet the command docker exec, which is a command that can run things on the container. In our case here, I want to run the Bash that’s in the MySQL container. What’s Bash? That’s just the terminal of the container.
docker exec -it mysql bash
So what do we have here? docker exec is the command
-it is the flag that makes commands open their own shell (more or less)
mysql is the name of the container. Notice, that’s its name—mysql like we set with docker run
bash is the command I want to run.
Once I do that, I go into the machine. You can see its name which is hash. I can wander around the machine and run commands as I wish. I can even run ls -al which is a Linux command to show a long list of all files in the current directory.


Now I can create databases, tables, and run queries just like in Linux.
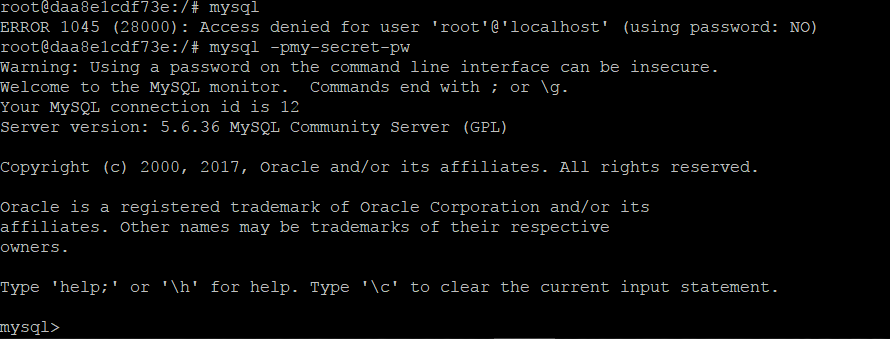
If you’re a little more familiar with Linux then you probably understand that I don’t have to use Bash. Why not just go straight to the MySQL service with docker exec? In principle, there's really no problem to do this. Instead of calling Bash, I’ll call mysql and not forget to use the password so that I won’t need to type it somehow.
docker exec -it mysql mysql -pmy-secret-pw
But most of the time I already have an SQL file that I want to put into my database. How to do this? Here too docker exec comes to the rescue. If I’m in Linux, MySQL allows me to easily import or export data. The only thing I have to do is make a database. In this example I create one (using CREATE DATABASE) called internet, and I import a database from my website, internet-israel.com.
cat il.sql | docker exec -i mysql /usr/bin/mysql -pmy-secret-pw internet_il
That’s it. There’s a little Linux syntax but there’s no need to freak out. Let’s break it down:
cat il.sql - I take the il.sql file. Notice that it has to be where I run the command. By default, Docker’s shell opens in Windows in the user directory.
Docker exec - you already know this one
-i - the interactive flag. Prevents the connection from being closed until the end of the action.
mysql - the name of the container.
/usr/bin/mysql -pmy-secret-pw internet_il - this is the command that I run in Linux in order to import data when I use the name and password of the database. That’s it.
Export is even easier—with this line I execute the export of internet_il to the file backup.sql.
docker exec mysql /usr/bin/mysqldump -u root -p=my-secret-pw internet_il > backup.sqlThat's about it for this one. Check back soon and we’ll wrap up our Docker series with a guide to creating our own settings file.
About the author: Ran Bar-Zik is an experienced web developer whose personal blog, Internet Israel, features articles and guides on Node.js, MongoDB, Git, SASS, jQuery, HTML 5, MySQL, and more. Translation of the original article by Aaron Raizen.
Recent Stories
Top DiscoverSDK Experts


Compare Products
Select up to three two products to compare by clicking on the compare icon () of each product.
{{compareToolModel.Error}}


{{CommentsModel.TotalCount}} Comments
Your Comment