Angular 5 To-Do List App - Part 3
In the previous article we made our to-do application nicer and added a task adding feature. We also added dynamic numbering to the tasks. The code of the previous article can be found in the previous article itself and the complete project can be found in the Github repository Learn Angular With Sabuj. Browse to the branch named todo-app-part-2 to get the full project code of the previous article. To get the full project of the current article browse to the branch named todo-app-part-3.
We are going to add more features to our application in this article.
Canceling a Task
We often need to cancel a task. In our application we will indicate a canceled task by striking through it. To cancel a task we will need to add a cancel button. The cancel button will be added beside the task in a separate column of the table. We will decorate the cancel button as a Bootstrap warning button. So, the HTML markup needed for it will look like below:
<tr *ngFor="let todo of todo_array; let idx = index">
   <td>
       {{ idx + 1 }}. {{todo}}
   </td>
   <td>
       <button class="btn btn-warning"> Cancel </button>
   </td>
</tr>
Note: > In the HTML for table in our last three articles on to-do application we forgot to put the task content inside a td tag. I have corrected the mistake in this article.
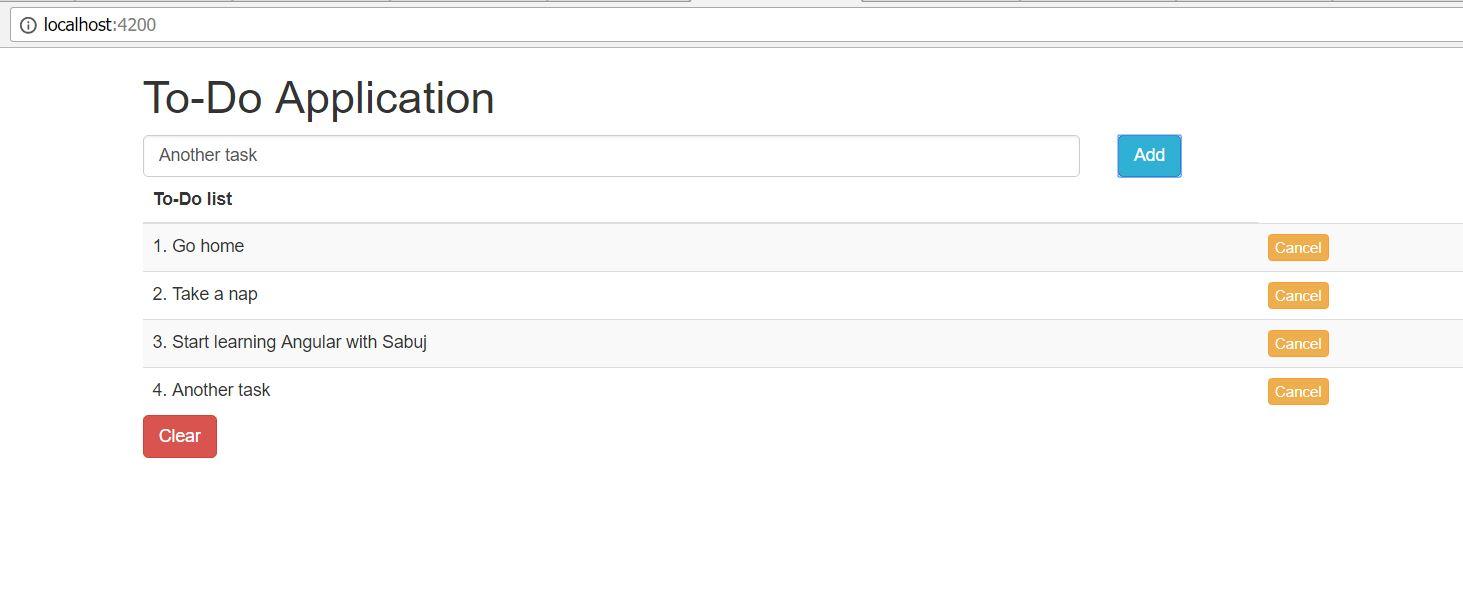
Go to the browser to see if everything is alright.
The button seems larger in appearance which doesn't seem so nice. Let's add the btn-xs Bootstrap class to make the button smaller. Go to the browser or look at the following screenshot to see how our application looks like now:

Until now things have been presentational—no functional change is being made, nothing happens when we click the cancel button.
Think to yourself, how will our component or angular or the template know how to keep track of canceled tasks, or which one to mark as canceled?
So, the array of string we have is not enough now. We need an array of objects. Let's create an interface for our tasks. For now, the interface will hold the information about the task title and the cancel status.
interface Task{
 title: string,
 is_canceled: boolean
}
Instead of todo_array we will have a tasks array property now. So, our tasks array should look like below:
tasks: Array<Task> = [
   {
     title: "Go home",
     is_canceled: false
   },
   {
     title:"Take a nap",
     is_canceled: false
   },
   {
     title: "Start learning Angular with Sabuj",
     is_canceled: false
   }
 ];
The clearToDo() method will change to:
 clearToDo(){
   this.tasks.splice(0);
 }
We will also need to change our addTask() method like below:
 addTask(value: string){
   this.tasks.push(
     {
       title: value,
       is_canceled: false
     });
 }
So, finally our app.component.ts should look like below:
import { Component } from '@angular/core';

interface Task{
 title: string,
 is_canceled: boolean
}

@Component({
 selector: 'app-root',
 templateUrl: './app.component.html',
 styleUrls: ['./app.component.css']
})
export class AppComponent {
 tasks: Array<Task> = [
   {
     title: "Go home",
     is_canceled: false
   },
   {
     title:"Take a nap",
     is_canceled: false
   },
   {
     title: "Start learning Angular with Sabuj",
     is_canceled: false
   }
 ];

 clearToDo(){
   this.tasks.splice(0);
 }

 addTask(value: string){
   this.tasks.push(
     {
       title: value,
       is_canceled: false
     });
 }
}
Our application will not work now as we haven't changed our template markup. So, let's modify our template markup.
<tr *ngFor="let task of tasks; let idx = index">
   <td>
       {{ idx + 1 }}. {{task.title}}
   </td>
   <td>
       <button class="btn btn-warning btn-xs"> Cancel </button>
   </td>
</tr>
Go to the browser to check that everything is still working properly.
Now, in our template we need to use *ngIf for striking through a canceled task.
<tr *ngFor="let task of tasks; let idx = index">
   <td *ngIf="task.is_canceled; else elseTd">
       <s>{{ idx + 1 }}. {{task.title}}</s>
   </td>
   <ng-template #elseTd>
       <td>{{ idx + 1 }}. {{task.title}}</td>
   </ng-template>

   <td>
       <button class="btn btn-warning btn-xs"> Cancel </button>
   </td>
</tr>
Still, we have no way of marking a task canceled. We need a click listener on the Cancel button. The handler method will accept the array index of task and make it canceled.
Let's add cancelTask() handler with the Cancel button like below:
<button class="btn btn-warning btn-xs" (click)="cancelTask(idx)"> Cancel </button>
We need to define the method in our component like below:
cancelTask(idx: number){
   this.tasks[idx].is_canceled = true;
}
We are retrieving the Task object by the index and setting its is_canceled property to true.
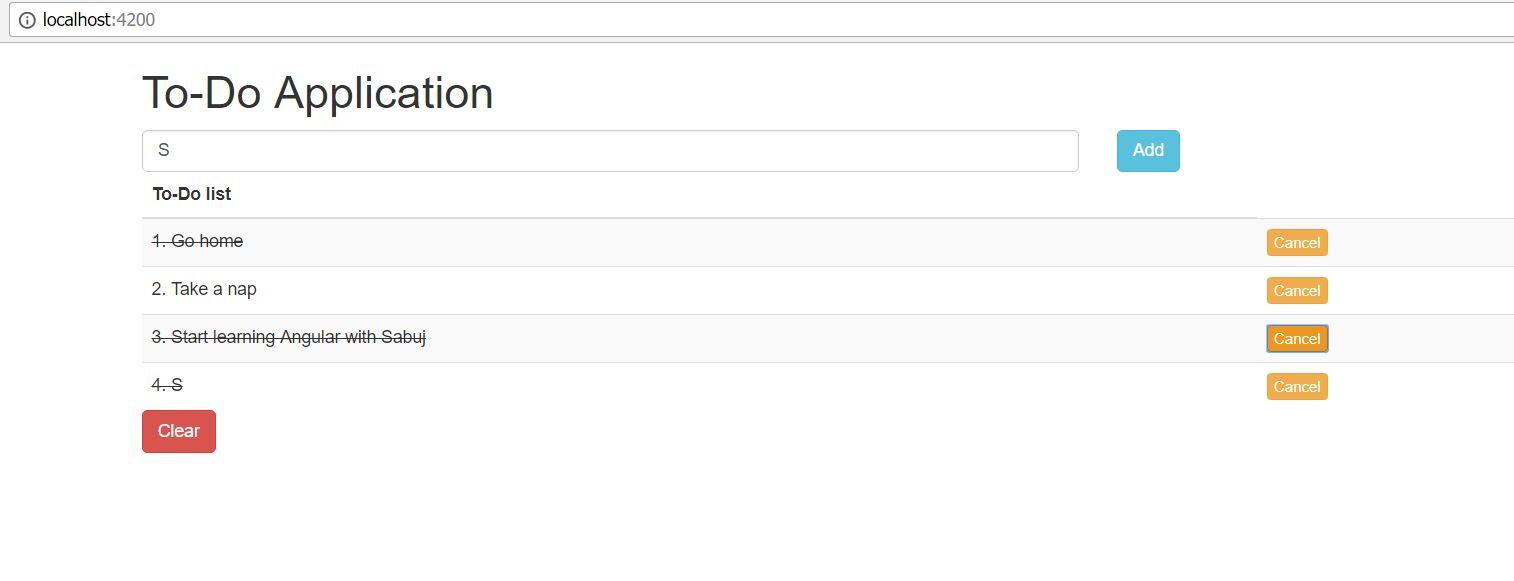
Now, go to the browser and click cancel for canceling a task to see what happens. Also, try adding new tasks and canceling them.

So, our application is working the way we expected.
Switching Task Cancellation
Sometimes we may need to cancel the cancellation. We want to click the cancel button again to cancel our cancellation. So, in our cancelTask() method we need to check whether the task is canceled, if it is canceled we will revert it otherwise cancel it. So, the method will look like below:
cancelTask(idx: number){
   if (this.tasks[idx].is_canceled){
     this.tasks[idx].is_canceled = false;
   }else{
     this.tasks[idx].is_canceled = true;
   }

}
Go to the browser to see if things are taking place according to our expectation. Yes, it is working properly now.
Conclusion
The life of a frontend application developer would be much harder without a frontend framework like Angular. If we wanted to carry out the tasks described in this article with the help of vanilla JavaScript or with additional help of jQuery, we could not go so far so quick and without bugs. Keep practicing Angular by creating such to-do applications. Whenever you have a question create an issue on the Github repository Learn Angular with Sabuj.
About the Author
My name is Md. Sabuj Sarker. I am a Software Engineer, Trainer and Writer. I have over 10 years of experience in software development, web design and development, training, writing and some other cool stuff including few years of experience in mobile application development. I am also an open source contributor. Visit my github repository with username SabujXi.
Recent Stories
Top DiscoverSDK Experts


Compare Products
Select up to three two products to compare by clicking on the compare icon () of each product.
{{compareToolModel.Error}}


{{CommentsModel.TotalCount}} Comments
Your Comment